Cute Bunny Crochet Pattern
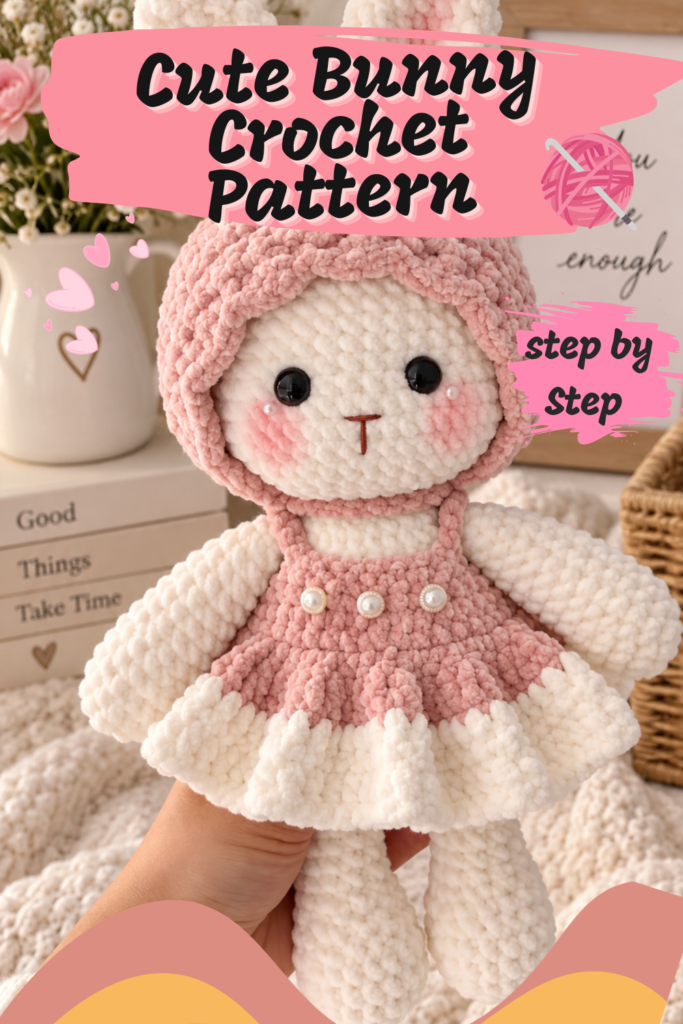
Some amigurumi projects are quick little ornaments. This one is something else entirely — a proper plush doll, soft enough to genuinely cuddle, with a rounded ivory bunny face, rosy embroidered cheeks, tall floppy ears peeking through a fitted green bonnet, and a ruffled two-tone dress that flares out beautifully at the hem. Worked entirely in chunky chenille yarn, the Cute Bunny has that irresistible velvety texture that makes you want to squeeze it the moment you pick it up.
This pattern is genuinely beginner-friendly despite how polished the finished doll looks. Every piece — head, arms, legs, body, ears, hat, and skirt — relies on straightforward increases and decreases worked in the round, with no complicated colorwork or unusual techniques to navigate. The chenille yarn does a lot of the heavy lifting visually, giving the finished doll a plush, professional look with very little fuss.
Let’s make ourselves a bunny.
Why This Bunny Is Worth Making
What makes this project so appealing is the payoff-to-difficulty ratio. Chenille yarn is wonderfully forgiving — its fuzzy, velvety texture hides small stitch inconsistencies that would show up clearly in a smoother yarn, which means even a newer crocheter can produce something that looks genuinely polished. Combined with the bulky yarn weight, the whole doll works up faster than a comparable project in standard worsted weight.
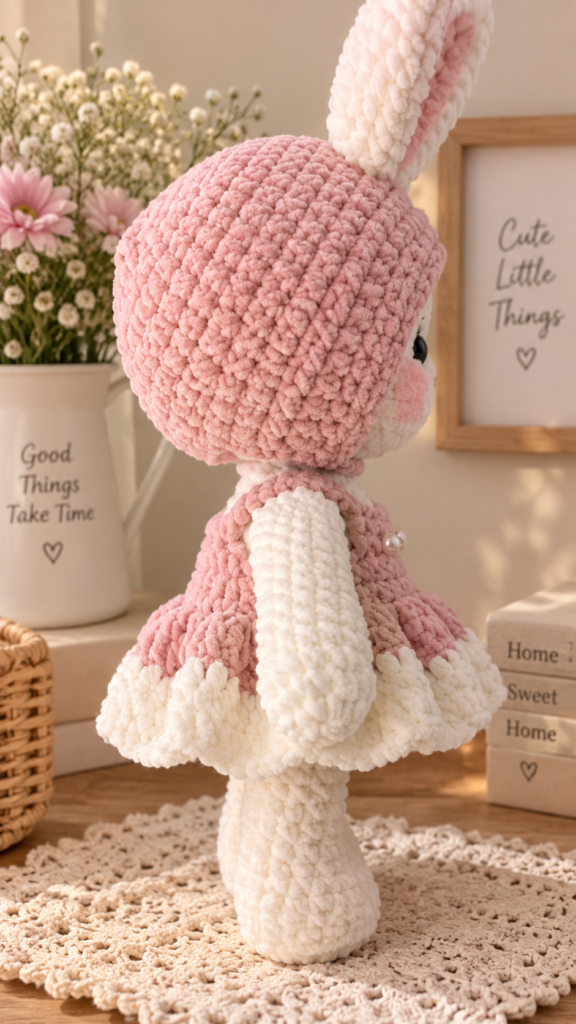
The outfit is really what elevates this from “cute bunny” to “complete doll.” Rather than crocheting clothing directly onto the body, the green bonnet and ruffled skirt are both made as separate, removable-style pieces with their own construction. The bonnet even has ear openings built into its shaping, letting the bunny’s tall ivory ears poke through naturally, which is a lovely design detail that makes the whole thing feel thoughtfully put together.
Understanding the Abbreviations (US Terms)
- MR = Magic Ring
- Rnd = Round
- Ch = Chain
- SC = Single Crochet
- HDC = Half Double Crochet
- DC = Double Crochet
- INC = Increase (2 single crochets worked into the same stitch)
- HDC INC = Increase (2 half double crochets worked into the same stitch)
- DEC = Decrease
- Slst = Slip Stitch
- St = Stitch
One helpful note before you begin: chains are not counted as a stitch in this pattern unless specifically stated otherwise.
Gathering Your Supplies
Yarn
Chenille Yarn Shine (yarn weight 5, Bulky/Chunky):
- 01 Ivory — 3 skeins
- 32 Spring Green — 1 skein
Hook
- 4.0 mm (US G-6) crochet hook
Additional Supplies
- Polyester stuffing
- Stitch marker
- Sewing needle
- Plastic safety eyes
Crocheting the Head
Using 01 Ivory:
- Rnd 1: 6 SC in a magic ring [6]
- Rnd 2: 6 INC [12]
- Rnd 3: (INC, SC) x6 [18]
- Rnd 4: (2 SC, INC) x6 [24]
- Rnd 5: (3 SC, INC) x6 [30]
- Rnd 6: (2 SC, INC, 2 SC) x6 [36]
- Rnd 7: (5 SC, INC) x6 [42]
- Rnd 8: (3 SC, INC, 3 SC) x6 [48]
- Rnds 9–15: 48 SC [48], worked over 7 rounds
- Rnd 16: (7 SC, INC) x6 [54]
- Rnds 17–18: 54 SC [54], worked over 2 rounds
- Rnd 19: (7 SC, DEC) x6 [48]
- Rnd 20: (3 SC, DEC, 3 SC) x6 [42]
- Rnd 21: (5 SC, DEC) x6 [36]
- Rnd 22: (2 SC, DEC, 2 SC) x6 [30]
- Rnd 23: (3 SC, DEC) x6 [24]
- Rnd 24: (2 SC, DEC) x6 [18]
Stuff the head firmly, then cut your yarn, leaving a long tail for sewing later.
Notice how the increase rounds distribute their increases in varied positions (sometimes at the end of a repeat, sometimes centered within it) — this staggering is what keeps the head from developing visible seam lines running up its sides, giving you a smoothly rounded sphere instead.
Crocheting the Arms (Make 2)
Using 01 Ivory:
- Rnd 1: 6 SC in a magic ring [6]
- Rnd 2: 6 INC [12]
- Rnd 3: (3 SC, INC) x3 [15]
- Rnds 4–5: 15 SC [15], worked over 2 rounds
- Rnd 6: (3 SC, DEC) x3 [12]
- Rnds 7–14: 12 SC [12], worked over 8 rounds
- Rnd 15: 6 DEC [6]
Stuff the arms, then cut your yarn, leaving a long tail for sewing. Repeat this entire sequence to make your second matching arm.
Crocheting the Legs (Make 2)
Using 01 Ivory, work in rounds and stuff as you go:
- Rnd 1: 6 SC in a magic ring [6]
- Rnd 2: 6 INC [12]
- Rnd 3: (SC, INC) x6 [18]
- Rnds 4–5: 18 SC [18], worked over 2 rounds
- Rnd 6: 6 SC, 3 DEC, 6 SC [15]
- Rnd 7: 6 SC, 2 DEC, 5 SC [13]
- Rnd 8: 6 SC, DEC, 5 SC [12]
- Rnd 9: 12 SC [12]
- Rnd 10: 2 SC, INC, 6 SC, INC, 2 SC [14]
- Rnds 11–12: 14 SC [14], worked over 2 rounds
Fasten off both legs once complete.
Those clustered decreases in Rounds 6 through 8 are all worked in the same section of the round rather than distributed evenly, which is exactly what shapes the foot: it pulls in the fabric at the ankle on one side while leaving the toe area fuller, giving each leg a recognizable foot shape rather than a plain tube.
Joining the Legs and Crocheting the Body
Connect your two finished legs together with Ch 3.
- Rnd 13: 34 SC [34]. Here’s how that breaks down: work 14 SC across the first leg, 3 SC along one side of the connecting chain, 14 SC across the second leg, then 3 SC along the other side of the chain, giving you 34 stitches total.
- Rnd 14: 7 SC, INC, 16 SC, INC, 9 SC [36]
- Rnd 15: (5 SC, INC) x6 [42]
- Rnds 16–21: 42 SC [42], worked over 6 rounds
- Rnd 22: (5 SC, DEC) x6 [36]
- Rnds 22–24: 36 SC [36], worked over 3 rounds
- Rnd 25: (2 SC, DEC, 2 SC) x6 [30]
- Rnds 26–29: 30 SC [30], worked over 4 rounds
- Rnd 30: (3 SC, DEC) x6 [24]
- Rnd 31: (2 SC, DEC) x6 [18]
Stuff the body firmly, then fasten off.
This joined-legs construction is a common amigurumi doll technique, and it’s genuinely satisfying to see in action — those two separate tubes suddenly become one continuous torso, with no seaming required between the legs and body.
Crocheting the Ears (Make 2)
Using 01 Ivory. Important: do not stuff the ears — they’re meant to stay flat and floppy.
- Rnd 1: 6 SC in a magic ring [6]
- Rnd 2: (INC, SC) x3 [9]
- Rnd 3: (2 SC, INC) x3 [12]
- Rnd 4: (3 SC, INC) x3 [15]
- Rnd 5: (2 SC, INC, 2 SC) x3 [18]
- Rnds 6–10: 18 SC [18], worked over 5 rounds
- Rnd 11: (SC, DEC) x2 [12]
Do not fasten off yet. Instead, Ch 1, then single crochet both sides of the ear together (6 sts), flattening the tube into a flat ear shape, and slip stitch into the first stitch you made. Fasten off, leaving a long tail for sewing.
Crocheting the Hat
Using 32 Spring Green:
- Rnd 1: 8 HDC in a magic ring [8]
- Rnd 2: 8 HDC INC [16]
- Rnd 3: (HDC, HDC INC) x8 [24]
- Rnd 4: (2 HDC, HDC INC) x8 [32]
- Rnd 5: (3 HDC, HDC INC) x8 [40]
- Rnd 6: (4 HDC, HDC INC) x8 [48]
- Rnds 7–9: 48 HDC [48], worked over 3 rounds
Shaping the Face Opening
- Rnd 10: 38 HDC, SK 10, then turn the work
- Rnd 11: SK 1, 37 HDC, turn
- Rnd 12: SK 1, 36 HDC, turn
- Rnd 13: SK 1, 35 HDC, turn
Those skipped 10 stitches in Round 10 are what create the bonnet’s open face area, and the subsequent turned rows shape the opening into a gentle curve that frames the bunny’s face rather than cutting straight across it.
The Decorative Edging
- Rnd 14: Ch 1, then SK 1, work [DC, Ch, DC, Ch, DC] all in the same stitch, SK 1, Slst, repeating between the asterisks 8 times. Then SK 1, work [DC, Ch, DC, Ch, DC] in the same stitch, Sl st, and Ch 10.
Leave a long tail for sewing. That Ch 10 at the end becomes a tie, and the repeating DC clusters create a soft scalloped picot edge framing the bonnet opening.
Crocheting the Skirt
Using 32 Spring Green:
- Rnd 1: Ch 37, then starting in the second chain from the hook: 5 SC, Ch 8, SK 8, 10 SC, Ch 8, SK 8, 5 SC, turn.
- Rnd 2: 5 SC, 8 SC into the chains, 10 SC, 8 SC into the chains, 5 SC
- Rnd 3: 36 SC
- Rnd 4: (5 SC, INC) x6 [42]
- Rnd 5: (6 SC, INC) x6 [48]
- Rnd 6: 3 DC in each stitch [144]
Those chain-8 sections skipped in Round 1 and filled back in during Round 2 are the armholes — a clever bit of construction that shapes the bodice around the bunny’s arms without any separate seaming.
Round 6 is where the dramatic flare happens: tripling every single stitch into 3 DC instantly triples your stitch count from 48 to 144, which forces the fabric to ruffle outward into that full, gathered skirt shape.
The Ivory Ruffle Hem
Change to 01 Ivory:
- Rnd 7: Ch 2, then SK 1, work [DC, Ch 1, DC] in the same stitch, repeating between the asterisks until the end of the round, then DC in the last stitch.
- Rnd 8: Ch 2, then SK 1, work [DC, Ch 1, DC] into the chain space from the last round, repeating between the asterisks until the end of the round, then DC in the last stitch.
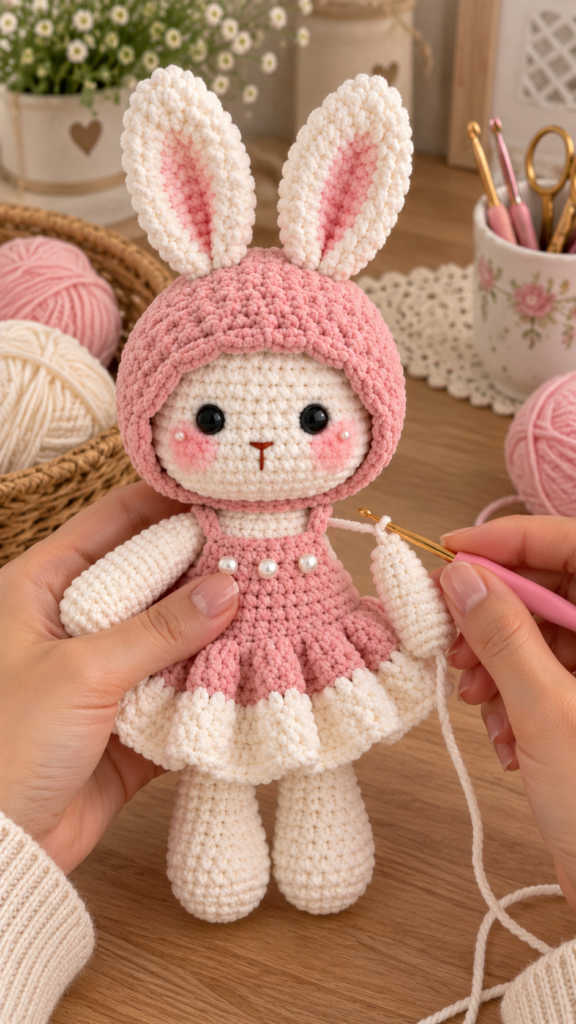
These two ivory rounds create that lovely contrasting ruffled trim at the hem, giving the dress its two-tone finished look.
Assembly
With all your pieces complete, it’s time to bring your bunny together:
- Sew the head to the body.
- Sew the arms to the body.
- Sew the ears to the hat, positioned between rounds 10 and 11, spaced 4 stitches apart.
- Embroider the nose onto the head, positioned between rounds 17 and 18.
- Glue the plastic eyes in place, positioned between rounds 14 and 15, spaced 4 stitches apart.
Frequently Asked Questions
Why does this pattern use chenille yarn specifically instead of standard worsted weight?
Chenille yarn has a soft, velvety pile that gives finished amigurumi a plush, toy-like quality that standard yarns can’t quite match. It’s also wonderfully forgiving for newer crocheters, since its fuzzy texture visually blurs small stitch inconsistencies that would be clearly visible in a smoother yarn.
Is chenille yarn difficult to work with compared to regular yarn?
It has a few quirks worth knowing about. Chenille can be harder to see individual stitches in because of its fuzzy pile, so working slowly and using a stitch marker consistently makes a real difference. It can also “worm” (develop little loops that pop out) if worked too loosely, so aim for reasonably firm tension throughout.
Why shouldn’t the ears be stuffed?
Leaving the ears unstuffed and flattening them by crocheting both sides together at the end is exactly what gives them their soft, floppy, naturally drooping character. Stuffed ears would stand rigidly upright and lose that sweet, slightly droopy bunny look.
Do the hat and skirt come off, or are they permanently attached?
As written, the pattern sews the ears to the hat during assembly, which means the hat stays in place as part of the finished doll. The skirt isn’t explicitly sewn on in the assembly instructions, so it can potentially remain removable if you’d prefer that, though you may want to tack it lightly in place for a child’s toy.
Why does the skirt jump so dramatically from 48 to 144 stitches in one round?
Working 3 DC into every single stitch triples the stitch count all at once, forcing far more fabric into the same circumference than can lie flat. That excess fabric has nowhere to go but outward and downward, which is precisely what creates the skirt’s full, gathered ruffle.
Can I use safety eyes instead of gluing plastic eyes on?
Yes, and for a toy intended for a young child, safety eyes with proper backings are generally the safer choice over glued-on eyes. If you go that route, insert them before the head is fully stuffed and closed, since you’ll need access to the inside to secure the backings.
How do I keep track of my rounds when working in a continuous spiral?
Use your stitch marker religiously — place it in the first stitch of each new round and move it up as you complete each one. With chenille yarn in particular, where individual stitches can be hard to distinguish visually, that marker becomes essential rather than optional.
Ready to Meet Your New Bunny
There’s something genuinely delightful about finishing a plush doll — watching a pile of soft chenille turn into a character with a face, an outfit, and real personality. Whether this bunny ends up as a gift for a little one or simply sitting on your own shelf looking sweet, it’s the kind of project that makes the hours spent on it feel entirely worthwhile.
Grab your hook, and let’s bring this soft little bunny to life.